Wednesday, September 21, 2011

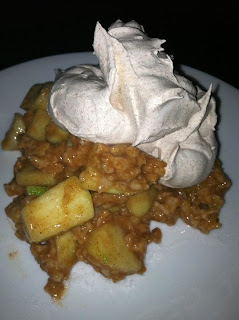
Applesauce Sweet Potato Fries


SWEET POTATOES!!!!! I love'em. These fries are versatile and are packed with so much natural flavors. Here is another quick and easy seasoning recipe. This one requires some marinating time, so its not a ready-set-eat meal but the wait is definitely worth it. By letting this marinate, the flavors are able to really seep into the sweet potato and instead of having a little bit of seasoning when you bake it, you experience all the flavor of the seasoning. I didn't create or pair a dipping sauce with these fries as I simply didn't see a need for one. They are fully capable of standing on their own.

Applesauce Sweet Potato Fries

Ingredients (serves 3-6)
3 sweet potatoes
2/3 cup applesauce
½ TBSP cinnamon
½ TBSP pumpkin spice
pinch of salt
pinch of pepper

1. Peel and cut the potatoes into fry length strips.
2. In a large freezer bag, place applesauce, cinnamon, pumpkin spice, salt, and pepper in bottom of the bag. Place the cut potato strips in to the bag and press out all the excess air and seal. Move the potatoes around in the sealed bag making sure ALL the potatoes be covered with sauce, about 3-5 minutes.
3. Place sweet potatoes in refrigerator for at least 3 hours but no longer than 5.
After marinate (refrigeration):
4. Preheat oven to 450 degrees.
5. Line two cookie sheets with wax paper and spray the paper with nonstick cooking spray. Remove marinated fries from the refrigerator and arrange amongst the two cookie sheets making sure the fries do not touch.
6. Bake in the oven for 12-15 minutes then remove, flip fries, and bake for a remaining 15- 20 minutes.  (**Note the fries may stick slightly to the wax paper due to the “sticky” applesauce, however, the cooking spray should help eliminate this.)
7. Remove from oven and allow the fries to cool for about a minute then immediately remove from pan. Best served warm but taste great cold. No need for a dipping sauce. Enjoy!

Monday, September 19, 2011

HERSHEY Oatmeal Cake


Okay, the one thing I say time and time again is NOT to be afraid to play around in the kitchen. This cake is one of the best examples of what can happen when you do. I sat down one evening after purchasing a bag of Bob’s Red Mill Gluten Free Oats and put pen to paper. At this point, I really hadn’t worked with oats much in the past. I think I made quick oatmeal and no bake cookies but that was it. As I wrote this recipe, I was unsure how it would turn out but was willing to take the chance. In reality, I was attempting to make a cookie but created a cake. A very happy accident this turned out to be, this cake has a “not-too-crunchy” crust and a moist chocolate filled center.

Hershey Oatmeal Cake

Ingredients
¼ cup white sugar
½ cup brown sugar
2 large eggs
1 TBSP vanilla extract
1 ½ cup all purpose flour (Bob’s Red Mill GF)
1 cup oat flour (Bob’s Red Mill GF)
1 TSP baking powder
1 TSP salt
1 cup oatmeal
1 cup semi-sweet HERSHEY'S chocolate chips
3 TBSP HERSHEY'S cocoa powder
½ TSP cinnamon
1 TBSP grade A maple syrup
powdered sugar to top
1.     Preheat oven to 350 degrees
2.     In a medium size bowl, mix flour(s), baking powder, cocoa powder, cinnamon, salt, oatmeal, and chocolate chips.
3.     In a large size bowl, cream together eggs and sugars. Add in maple syrup and vanilla extract. Add in your dry flour mix.
4.     Grease a 9-inch round baking pan and pour batter into it.
5.     Bake for 15 minutes at 350 degrees this will make the crust (top and bottom) nice and crunchy but not burnt. Bring the heat back to 310 degrees and bake for another 10 minutes. Use to the toothpick trick to test that the center is not gewy.
6.     Remove from oven and top the cake with powdered sugar. Allow to cool for half an hour before serving. Serve as is or with chocolate syrup, extra powdered sugar, or simple icing (recipe listed below). Be your own chef!!!!! Enjoy!

Hershey Oatmeal Cake
w/ Simple Icing

Simple Icing
1 greek yogurt cup (6 oz)
1 cup powdered sugar
2 TSP vanilla extract

1. In a medium size bowl, whisk mix together yogurt, powdered sugar, and vanilla extract.
2. Cover with saran wrap and place in refrigerator for half an hour (to thicken up) before using.

Sunday, September 18, 2011

Apple Oatmeal Twist


Apple oatmeal twist is a slight variation to the classic hot oatmeal cereal. Nothing fills you up faster than a nice warm bowl of oatmeal on a chilly fall day. This dish can be served hot or cold, with or without the topping, ultimately this is the opportunity to be your own chef and decide how you wish to eat it. And it can all be accomplished in under 10 minutes!

Apple Oatmeal Twist


Ingredients


Apple Oatmeal Mix
½ cup rolled oats (Bob’s Red Mill Gluten Free Oats)
1 cup apple juice
½ TBSP cinnamon
1 TSP sugar
1 granny smith apple

Topping
½ cup cool whip
1 TSP cinnamon
Apple Oatmeal Mix
1.     In a medium/large bowl place ½ cup rolled oats and 1 cup of apple juice. Stir and cover bowl, microwave for 1 ½ to 2 minutes.
2.     Core and peel the skin from apple and cut into small/medium chunks.
3.     Remove bowl from microwave (be careful it will be hot) and fold in the cinnamon, sugar, and apple chunks, mixing thoroughly.
4.     If you wish to eat warm, immediately continue to the whipped topping portion of this recipe. If you wish to eat cooled, cover with saran wrap and place in refrigerator for 1 hour.

Topping
1.     In a small bowl, mix ½ cup cool whip and 1 TSP cinnamon and mix well.
2.     Dollop on top of apple/oatmeal mixture or serve on the side. Enjoy.

Friday, September 16, 2011

Pumpkin Puffs


My pumpkin puff cookies recipe actually evolved from a plain sugar cookie recipe. These bad boys are exactly what the name suggests; puffy and full of pumpkin. Not only is the name fun to say but these cookies have a subtle pumpkin flavor and a hint of sugar cookie.  I absolutely love them and I think you will too. :-)
Pumpkin Puffs

Ingredients
1 cup sugar
1 cup softened butter
1 egg
1 TBSP pure vanilla extract
2 ¼ Gluten Free All Purpose Flour (Bob’s Red Mill)
1 TSP baking soda
1 TBSP cinnamon
1 TBSP pumpkin spice
4 TBSP pumpkin
1 tsp xanthum gum (If not GF and using white all purpose flour, this is not needed)
1.     In a large bowl, mix sugar and butter. Beat in egg and vanilla until light and fluffy. Thoroughly mix in cinnamon, pumpkin spice, baking soda, and xanthum gum. Add in pumpkin and mix well. Lastly add in flour and mix well.
2.     Cover the bowl with saran wrap and place in the refrigerator for approximately 1 hour or until chilled.
3.     Preheat oven to 375 degrees. Line a cookie sheet (possibly two) with wax paper and remove the batter from the refrigerator. This batter is extremely sticky and a little hard to work with. You may want to get a small dish of water to dip your spoon and a few fingers in when moving this batter onto the sheet. You want to make small balls (about the size of a half dollar quarter) and no higher than half an inch. Sprinkle each cookie ball with sugar.
4.     Bake for 15-20 minutes. Remove from sheet and allow cooling. Enjoy.
Pumpkin Puff "Close-Up"
Plate of Pumpkin Puffs

Sweet Potato Fries

Looking for a healthy alternative to the usual greasy, and deep fried french fry? Sweet Potato Fries are sweet, crispy, and delectable. Not only are they healthy but they are really easy to make. There are a number of seasoning combination's that you can use on Sweet Potato Fries and below is one of my personal favorites.

Sweet Potato Fries

Ingredients
(serves 2-4)

3 medium/large Sweet Potatoes
2 TBSP Extra Virgin Olive Oil
1/4 TSP Black Pepper
1 TSP Cinnamon
1/4 TSP Pumpkin Spice
Pinch of Sea Salt

1. Preheat oven to 425-450 degrees.
2. Wash and peel sweet potatoes. Cut into medium-sized chunks and place in a medium-large bowl.
3. Sprinkle 2 TBSP EVOO, salt, cinnamon, and pumpkin spice over the sweet potatoes. Toss several times making sure each potato chunk is covered with olive oil/salt/pepper/spice mix.
4. Cut parchment paper to cover the bottom of a cooking sheet. Spread sweet potatoes over the length of a cooking sheet making sure they do not touch or overlap. You may need two cooking sheets.
5. Sweet Potatoes will cook for approximately 30 minutes. You will need to flip them halfway through the process. I recommend checking them at the 15 minute mark and flipping them as they should have crisped on the bottom.  Let the sweet potatoes finish baking for another 10-15 minutes.
6. These can be served with a number of options. I tend to dip them into maple syrup myself but will also work with a sour cream/onion dip. Enjoy!!!

Apple Pumpkin Dessert (10 Minute Fix)

Want a quick, simple, tasty, and easy to make snack? Look no further than my 10 minute Apple Pumpkin Dessert.

Apple Pumpkin Dessert
10 Minute Fix

Ingredients
(serves 1-2)

2 TBSP Sugar
1/3 cup Canned Pumpkin
1 1/2 TSP Pumpkin Spice
2 TBSP Water
1 Granny Smith or Fiji Apple

1. Core and chop the apple. You can remove the skin or leave it on depending on your preference.
2. In a medium/large microwave safe bowl, sprinkle sugar and pumpkin spice in the bottom of the bowl. Add in apple slices. Pour water over the top and mix apples and spices thoroughly.
3. Cook in microwave on high for 3 1/2 to 4 minutes, stirring every minute.
4. Enjoy!

Thursday, September 15, 2011

Carrot Fries w/Barbecue Sauce

Super simple, yummy, and easy. I absolutely LOVE carrot fries. I like them more than sweet potato fries and maybe even more normal french fries.

Carrot Fries
w/Honey Barbecue Sauce

Ingredients (serves 2-3 people)
4 Medium/Large Carrots
2 TBSP Extra Virgin Olive Oil
Pinch of Salt
Pinch of Pepper
2-4 TBSP Honey Barbecue Sauce

1. Preheat oven to 375 degrees.
2. Wash and peel carrots. Cut into medium-sized chunks and place in a medium-large bowl.
3. Sprinkle 2 TBSP EVOO, salt, and pepper over the carrots. Toss several times making sure each carrot is covered with olive oil/salt/pepper.
4. Spread carrots over the length of a cooking sheet making sure the carrots do not touch or overlap.
5. Carrots will cook for approximately 20-30 minutes. You will need to flip them halfway through the process. I recommend checking them at the 10 minute mark. If they are starting to crisp on the bottom it's time to flip them, if not, let them cook another 5 minutes but do not exceed 15 minutes. Let the carrots finish baking for another 10-15 minutes.
6. Serve with honey barbecue sauce. Enjoy!!!


Thursday, September 8, 2011

Pumpkin Roll


I love pumpkin and with the Holidays quickly approaching, I wanted to make sure I posted my recipe for this family favorite. I made this roll for Thanksgiving last year. It was the first time I had ever had a pumpkin roll rather-less make one but it turned out perfect. There is not a single thing I could have done to it to make it better. I ended up making three rolls before Thanksgiving was over and had requests for it to reappear at Christmas. I've already had people asking about it for this years holidays. This pumpkin roll is a sure crowd pleaser gluten free diet or not. 
Pumpkin Roll

Pumpkin Roll with Cream Cheese Filling
Ingredients
3 Eggs
1 cup Sugar
2/3 cup Pumpkin
1 tsp Lemon Juice
 ¾ cup All –Purpose Flour (Bob’s RedMill All-Purpose GF Baking Flour)
1 tsp Baking Powder
2 tsp Cinnamon
1 tsp Nutmeg
½ tsp salt
Filling
8 ounces Cream Cheese – softened
4 TBSP Butter or Margarine
1 cup Powdered Sugar
½ tsp Vanilla

  1. In large bowl, combine eggs and sugar, beating with an electric mixer until thick and light yellow in color. Add pumpkin and lemon juice, mixing until blended.
  2. In separate bowl, combine flour, baking powder, spices, and salt. Add to egg mixture, mixing well. Spread batter into greased and/or waxed-paper lined 10x15 inch pan.
  3. Bake at 350° for 10-15 minutes, remove from oven. Sprinkle light dusting of powder sugar on over cake. Cool for 15 minutes. Spring additional powdered sugar over cake and place cake on clean kitchen towel sprinkled liberally with powdered sugar. Cool 10 minutes longer. From 10 inch side, roll cake up in towel and set aside.
  4. While cake is cooling in towel, prepare the filling. Beat together cream cheese and butter; stir in powdered sugar and vanilla blending until smooth.
  5. Unroll cake. Evenly spread filling over cake. Roll up cake (without towel). Wrap in plastic wrap. Cover and chill at least 1 hour before serving.
  6. Leftovers are to be refrigerator, roll also freezes well. Enjoy!
 

Chicken Ratatouille


Ratatouille is a traditional French Provencal stewed vegetable dish that originated in the city of Nice. Ratatouille is typically served as a side dish but can also be served on its own when accompanied by rice, pasta, or meats. Typical ingredients found in ratatouille include tomatoes, garlic, onions, zucchini, eggplant, bell peppers, carrot, marjoram, and basil or thyme. See below for my delicious twist on a classic.
Chicken Ratatouille

Chicken Ratatouille
1 red pepper
1 yellow pepper
1 orange pepper
2 large potatoes
1 can of chicken broth
1 can of green beans
1 zucchini
1-2 cups cooked shredded chicken
3 TBSP Olive Oil
Salt
Pepper
Basil

1.     In a large pot over medium heat, place 3 TBSP of olive oil in the bottom of the pot. Cut the red, yellow, and orange peppers into long slices and put in the bottom of the pot with the olive oil. Stir together and continue to stir occasionally.
Pepper and Olive Oil

2.     While the peppers cure, cut up two large potatoes into semi-thick slices. Place potatoes into the pot with the peppers and stir. Add a pinch of salt and black pepper. Cover pot and keep heat the same. Cure for 10-15 minutes stirring occasionally but not too often because you don’t want the potatoes to turn to mush.
Peppers and Potatoes

3.     Once your potatoes are cooked, soft but not mushy, add in can of chicken broth and cover for another 5 minutes.
4.   Cut up your zucchini into small pieces. Add zucchini, can of green beans, and shredded chicken to the pot and stir well. Leave uncovered and turn down heat to a simmer. Add a dash of salt, pepper, and basil. Enjoy.

Wednesday, September 7, 2011

Chicken Alfredo Pasta


Okay, this five minute recipe requires left-over spaghetti and cooked chicken but of course, you can also cook it fresh. See below for a recipe for quick homemade alfredo.

Chicken Alfredo Pasta

Chicken Alfredo Pasta
1 cup of cooked spaghetti
1 cup of cooked chicken
2 wedges of Laughing Cow Swiss Cheese
4 TSP Grated Parmesan
2 TBSP of Greek Yogurt
Salt
Pepper
Basil

1. In a bowl mix your spaghetti and chicken together. Heat in microwave until at your desired temp if not cooked fresh.
2. In a cup mix the laughing cow Swiss cheese, grated Parmesan, and Greek yogurt. Heat in microwave for 30 seconds. Remove, stir, and heat for another 30 seconds. Stir well to get all the clumps out.
3. Mix your spaghetti chicken mixture with the Swiss cheese mixture. Salt and Pepper to taste and top with basil. Enjoy.

Monday, September 5, 2011

Portobello Mushrooms with Carrot Mashed Potatoes


This combination is surprisingly delicious, filling, and may even make you rethink your opinion of Portobello mushrooms. Even if you are not a fan of Portobello's, I think you will love the taste of the creamy and sweet carrot mashed potatoes. These two work in harmony but don't take my word for it, try it out for yourself. 

Portobello Mushroom
w/ Carrot Mashed Potatoes

Portobello Mushrooms with Carrot Mashed Potatoes
(serves 2)

2 large Portobello mushroom caps
1 medium carrot
2 medium potatoes
2 TBSP butter, melted
2 TBSP milk
2 laughing cow Swiss cheese wedges
¾ cup mozzarella cheese
Sea Salt
Peppercorn
Minced Garlic
Olive Oil
Basil

Portobello Mushrooms
1. Remove the stems from your mushroom caps. Cover both sides of the mushrooms with olive oil. Season both sides with sea salt, peppercorn, and minced garlic. You only want a “dash” of each of these seasonings but use your judgment.
2. In a skillet over medium heat, cook the mushrooms beginning with cap topside down. You’ll flip the caps probably twice during cooking. The process will take 5-10 minutes. The mushroom is done when the oil in the pan (from the mushroom) has a hint of black color to it and the mushrooms have darkened.
3. Remove skillet from heat and with the inside of the mushroom facing up, distribute the mozzarella cheese between the two caps. The heat from the mushrooms and skillet will melt the cheese nicely.
Carrot Mashed Potatoes

Carrots
1. Bring a pot of water to a boil, adding a pinch of salt to the water. Peel carrot and place in the rapid boiling water.  Strain and remove carrot from water once the carrot strings mush easily to the touch but are still in string form, about 5-8 minutes. Reserve 1 cup of carrot water.

Potatoes
1. Peel the skin from 2 large potatoes and discard. Chop potatoes into small 1-2 inch cubes and place in a microwave safe bowl. Microwave for 10 minutes or until soft. Remove from microwave and mash potatoes as best as you can.

Bringing it Together
1. Take your mashed potatoes bowl and add in milk, butter, ¼ cup of carrot water, and mix well. Add in 2 wedges of laughing cow cheese and carrots. Using a blender, mix all together well and season with a dash of sea salt and peppercorn. (If you want your potatoes creamier, add a little more carrot water and a hint of milk.)
2. Place carrot mashed potatoes on top of your mozzarella Portobello mushrooms and sprinkle dried basil over the top. Enjoy!

Sunday, September 4, 2011

Pumpkin Cranberry Bake


Looking for a new dish for the upcoming holiday season? Look no further than my Pumpkin Cranberry Bake! This pudding casserole is rich, hearty, and fills you with warmth. It is versatile and can be made as a bake or a pie. 
The following recipe is for the bake but simply split the recipe into two halves and place amongst two pre-made piecrusts and tadah, Pumpkin Cranberry Pie. 
This recipe is the perfect addition to Thanksgiving dinner.

Pumpkin Cranberry Bake


Pumpkin Cranberry Bake
(13.5 x 9.5 x 2 serving size)

Casserole/Pudding
8-10 sweet potatoes (2 cups mashed)
1 can (15 ounce) 100% Pure Pumpkin
¼ cup packed brown sugar
3 TBSP butter, softened
1 tsp sea salt
½ tsp pepper
2 large eggs

Cranberry Layer
2 cans (14 ounce) cranberry sauce
3/8 cup of sugar
¼ cup of brown sugar

Topping
1 stick of butter, melted
½ cup sugar
1 tsp pumpkin pie spice
2 TBSP Cinnamon
Casserole
1. Peel the skin from the sweet potatoes and discard. Cut potatoes into 2-3 inch chunks and place in a microwave safe bowl. Heat in microwave for 15 minutes or until potatoes are tender. Place in a large bowl and mash. This should produce 2 cups of Sweet Potato.
2. Add to mashed sweet potatoes, 1 can of 100% pure pumpkin and mix thoroughly. Add in brown sugar, butter, salt, and pepper. Add eggs and mix. You may need to use a blender to remove all the lumps.
3. Butter the bottom and sides of a 13.5x9.5x2 baking pan and evenly distribute the pumpkin/sweet potato mixture. Set aside.
Pumpkin/Sweet Potato Layer

Cranberry Layer
1. Remove cranberry sauce from can and cut into small pieces.
Cranberry with sugar
Step 2

2. Over medium heat place the cranberry sauce into a deep skillet. Add white sugar and heat for approximately 5-10 mintues stirring often and “mushing’ the mixture into a jam-like consistency with your spatula.
3. Add brown sugar and cure for another 5-10 minutes. If your cranberry doesn’t resemble a jam like consistency you need to continue stirring and lightly mashing with your spatula until it does. Remove from heat and allow to cool for a few minutes. Using a spoon, evenly distribute your cranberry mix on top of the pumpkin/sweet potato layer that you spooned into the baking pan.
Cranberry Layer
Step 3
4. Bake in oven for 25 minutes and remove from oven, immediately add topping.  

Topping (make while casserole is baking)
1. Melt 1 stick of butter in a bowl. Set Aside.
2. In separate bowl, mix sugar, pumpkin pie spice, and cinnamon together.
3. Once casserole has baked for 25 minutes and you have removed from the oven, sprinkle a light layer of the sugar mixture over the top of the casserole. Taking your fingers, a spoon, or a pastry brush, lightly sprinkle butter over the sugar layer.
4. Return casserole to the oven for another 10-12 minutes, or until the topping is dark brown/purple in color and the mixture has completely darkened. Allow to cool for 5 minutes before serving. Best served warm. Enjoy!
The topping FULLY baked.

Friday, September 2, 2011

Fried Ice Cream


No Mexican meal would be complete without fried ice cream. This tasty treat is typically found at traditional Mexican restaurants, and even though it is fried you’d be surprised at how sweet and light this tastes. Best of all, it doesn’t take many ingredients. You’re only five minutes from a yummy treat.

Fried Ice Cream
w/ Chocolate Syrup


Fried Ice Cream
(Serves 3)
3 flat corn tortillas
1/2 cup sugar
3-4 TBSP cinnamon
Chocolate Syrup (or Caramel)
Vanilla Ice Cream
Oil for frying

1. In a small bowl mix sugar and cinnamon together. Move from bowl to plate. Your plate should be big enough to place a tortilla on. Set aside.
2. For concentrated coverage, use a pan or skillet that is roughly the same size as 1 corn tortilla. Pour enough oil in the bottom of the pan to lightly cover the bottom and bring to a medium/high heat. NOT too hot or you will scorch the tortilla causing it to crisp unevenly. After about a minute of heating, place one tortilla in the oil. Allow to fry on both sides, flipping 2-3 times during the cooking, to ensure an even fry.
3. Immediately remove from oil and place on a paper towel covered plate. Using an additional paper towel, lightly blot the top of the fried tortilla. After bloating, while the tortilla is still hot/warm from the fryer, dip into the plated sugar/cinnamon mixture from step one. Flip the tortilla and coat with mixture heavily on both sides. Repeat steps 2 and 3 on remaining tortillas.
Coated Tortilla
Step 3
4. Place coated tortilla on plate and top with 1-2 scoops of vanilla ice cream. Using left over sugar/cinnamon lightly sprinkle over the vanilla ice cream. The cinnamon/sugar will grab onto the ice cream and cover with ease. You can eat as is or drizzle your favorite sweet syrup (chocolate or caramel) over the top. Enjoy!

Thursday, September 1, 2011

Chicken Taquitos


Taquitos, oh, taquitos… how I love thee. I believe you are tied with enchiladas for the best “Mexican” dish in my book. You are crunchy and simple yet full of flavor while being versatile. I can dress you up or dress you down and either way you simply amaze.
If you haven’t had a taquito before, I must say, you are missing out. A taquito or “flauta” is a small rolled up tortilla typically filled with beef or chicken. They are  best described as a cross between a taco and an enchilada. This crunchy dish can be paired with salad, guacamole, queso fresco, Mexican Cheese, Mozzarella, sour cream, salsa, pica de gallo, crema (Mexican Sour Cream), green chili and red chili.   
 
Chicken Taquitos
w/melted Mexican Cheese, Salsa, & Sour Cream

Chicken Taquitos
(makes 10)
10 flat corn tortillas
2 cups cooked shredded chicken (or other type of meat or cheese)
1 round or wedge of Babel/Laughing Cow semi-soft cheese
10 toothpicks
1-2 cups oil (for frying)
Salt
Pepper
Sour Cream
Mexican Cheese
Salsa

1. In a medium bowl add shredded chicken and a pinch of salt and pepper to taste. With you fingers, tear small pieces of your babel/laughing cow semi-soft cheese wedge into your chicken mix. Toss with the chicken and mix the cheese well. Set aside.
2. In this step we well be warming the corn tortilla shells slightly. We do this so we can easily roll the tortillas. Otherwise, corn tortilla shells have a tendency to break and crumble. I suggest only heating 2-4 at a time, depending on how fast you can stuff. Place 2-4 tortillas on a plate and pop in the microwave for 20-25 seconds. Remove immediately from the microwave and place a decent strip of chicken meat horizontally across the length of the tortilla (closer to the end) and roll. Place a toothpick through the entire taquito making sure to place the toothpick near the roll flap.  Repeat on remaining 9.
Taquitos placed in skillet
Step 2/3
3. Cover the bottom of skillet with oil, enough to cover the taquito halfway, and heat on Medium heat. Arrange taquito’s side-by-side and cook until golden brown on both sides. You will probably want to turn the taquitos a few times on each side to ensure evening browning.
Taquitos browning
Step 3
4. Remove from skillet and place on a paper towel covered plate to sop up excess oil. You’ll also want to lightly blot the top of the taquitos with a paper towel as well. Remove toothpicks immediately.
Taquitos drying off excess oil
Step 4
5. Eat plain or topped with cheese, salsa, pica de gallo, etc. Enjoy!

Wednesday, August 31, 2011

Cinnamon Crunch Cookies


Okay, this wouldn’t be a food blog without the occasional tasty treat, and I definitely have a sweet tooth that requires conquering. If you were to look at my culinary background, you would find that I was primarily a baker but not really a cook. I'm sure I could come up with a million (okay maybe not THAT many) excuses as to why; but the simplest answer would be, I like sweets. Don't get me wrong, I understand all good things in moderation and I'm all for healthy eating/cooking habits. Yet sometimes you don't want healthy. Sometimes, you need something filled with owey goey goodness.
When creating these cookies I had a very specific taste in mind. I wanted to capture something that I loved in my "wheat eating days" but hadn't been able to find in recent years. For you gluten eaters, I'm talking about the cinnamon bread sticks found at such pizza chains as Papa Johns, Pizza Hut, Mr. Gatti’s, Chuck E. Cheese, CiCi's Pizza, etc. To me, these cookies come pretty close to satisfying that craving. What's even better? These cookies aren't packed with the same amount of fat, carbs, and calories that you would find in a typical cinnamon bread stick.
Some of the best features of this recipe: quick, easy, little prep time, minimal baking time, your kids can help, no mixers, no waiting for yeast to rise, no separating of egg yolks, you can eat them without or without icing, and they can be made in advance of dinner parties, outings, or functions. 

Cinnamon Crunch Cookies
w/Icing

Cinnamon Crunch Cookies
(makes 24 cookies) 
3 corn tortilla shells
1 cup sugar
4-5 TBSP cinnamon
1/2 stick butter
Icing Drizzle
1/2 cup powdered sugar
3 tsp vanilla extract

1. Preheat oven to 400 degrees
2. Place three tortillas on a plate and microwave for 25 seconds. Remove from the microwave and cut stack of three into 8 triangles.
Preheated and cut corn tortillas
Step 2
3. Place 1/2 stick of butter in a bowl and melt in microwave. In a separate bowl, mix the sugar and cinnamon together.
Butter and Cinnamon
Step 3
4. Spray a non-stick cookie sheet with cooking spray. Create a mini assembly line starting with your tortillas, melted butter bowl, sugar & cinnamon combo bowl, and ending with the cookie sheet.
5. At this step, I suggest designating a butter hand and a cinnamon sugar hand as this part can get a little messy. Using your butter hand (likely your left hand), dip the tortilla triangle in the melted butter making sure to cover both front and back. Drop in the sugar mix. Using your sugar hand (likely right hand), cover the buttered triangle on both sides. Place fully dipped tortilla on cookie sheet. Repeat on 17 remaining tortilla chips.
Cookies coated and ready to pop in the oven
Step 5
6. Bake in oven for 5 minutes. Be careful to NOT over bake. You will notice that some of the mixture ran off the cookies and formed in the cookie sheet. This is normal and will easily break off when removing the cookies from the sheet (which you want). Discard the excess that accumulated in cookie sheet.
Fresh out of the oven. The excess will flake off
the cookies when removed from sheet.
Step 6
7. Remove cookies from sheet and place on serving tray, cooling rake, or plate to cool. Allow cookies to cool for 20- 30 minutes BEFORE serving. If you eat these straight from the oven they will be extremely chewy and we want them crunchy. Optional: Drizzle the top with my quick and easy icing (recipe followed below).
Cookies removed from pan to cool
before applying icing.
Step 7
Icing
1. Mix 1/2 cup powdered sugar and 3 tsp of vanilla extract together in a bowl. Mix until perfectly blended with no chunks of sugar left. If you believe the mixture is still too sweet add TINY amounts of vanilla and mix well. Drizzle over cookies. Enjoy!

String Carrots


This recipe is extremely simple and is the basis of my “spaghetti alternative experiment”. I am working on finding ways to make food like spaghetti in both taste and texture without actually being high in fat and calories like traditional pasta. Oh and I’m a little obsessed with peeling things. I find it fun!!! I know, weirdo!
These carrots are great hot off the stove or cooled, and are perfect as a snack or a great side dish.
String Carrots
seasoned w/Peppercorn

String Carrots
3-4 medium whole carrot stalks
pinch of salt
pinch of peppercorn
splash of olive oil

1.     Using a peeler, cut your washed carrots into even long strips cutting from the top of the carrot to the bottom. You will likely end up with a piece of carrot about an inch thick that you can’t seem to get any additional strings from and this is OK. Cut it into 3 or 4 chunks that we will throw in the skillet with the carrot strings. This will help retain the carrot taste through cooking.
2.     In a medium skillet, heat about 1/3 cup of water over medium heat. Add your carrots including the stalk chunks. Use a pinch of salt and peppercorn to season your carrots. Continue to heat over medium heat, turning occasionally, for approximately 5-8 minutes. The longer you cook it the softer the consistency will become. You want them to be “al dente” like noodles but cook them to your preferred consistency. The water should mostly be evaporated into the carrots when they are done. If not, drain them to get out the excess water.
3.     Drizzle olive oil over top. Enjoy.

Tuesday, August 30, 2011

Stuffed "Taco" Chicken


I have a confession, I really do enjoy cooking. The more I do it, the more inspired I feel. In the beginning though, I really thought there was NO way I would be able to continue to come up with new things to try but I was SO wrong. It seems to occupy my time even when I don't realize that I am consciously thinking about it. Granted, I do spend a lot of my "free time" watching cooking shows, researching online, and reading magazines and articles about food. I really am finding that I have a passion for doing this and for someone who has always found it hard to say "my hobby is", this is pretty big for me. Not only is it a necessity of life but its fun for me. 
That being said, I only have one piece of advice for you; don't be afraid to try something new and don't be afraid to make mistakes. I have definitely made many in the kitchen but thankfully nothing ever major, and it can get discouraging when things don't turn out. However, this can be said for all things in life and not just cooking. I'm finding that my eyes are opening up to many other possibilities in life, even those outside the kitchen. I think my willingness to relinquish some of my "control" and just go with the flow has lead me to adjust my approach to many things in life. Who thought cooking could inspire spiritual growth too, huh?!

So enough of my babbling about my new and latest obsession that is cooking, continued below is my recipe for Stuffed "Taco" Chicken. I hope you enjoy it as much as I did. 
Stuffed "Taco" Chicken

Stuffed “Taco” Chicken
(Each chicken is approximately only 280 calories with 4 grams of fat)
4-8 TBSP pizza sauce
1/2 cup fat free refried beans
3 laughing cow cheese wedges (swiss or soft white cheese) (room temperature)
1/4 cup fat free Mexican cheese assortment (moneterey jack, cheddar, queso & asadero)
16-18 white or yellow corn baked tortilla chips
1 tsp taco seasoning
4 chicken breasts frozen or thawed
Look at that JUICY chicken breast!
 
Topping:
1. Place 16-18 tortilla chips in a freezer bag and crush into fine pieces. Don’t over process, you don’t want sand, but the smaller the pieces the better it will stay on the top of the chicken. Add 1 tsp of taco seasoning to the crushed chips and mix well. Set aside.
Stuffing:
1. In a medium sized bowl combine 1/2 cup of refried beans, 3 laughing cow wedges, 1/4 cup Mexican cheese assortment and mix well. Set aside.
Chicken breast:
1. Most conventionally sold chicken breasts are thick and small. We want our pieces to be long and skinny. Not paper-thin but the longer the pieces are the easier it will be to “roll” the chicken with the mixture. Your ideal length is about 2-3 inches wide and 3-4 inches long with a density of 1 inch or less. Using a meat tenderizer work your chicken into roughly this measurements IF your meat doesn’t already meet this requirement. If you happen to have pre-flattened chicken, I would suggest that you still use a meat tenderizer on the meat a few times. Not enough to change the overall consistency but enough to “open” the pores of the meat, which will help to retain the chicken's moisture. After tenderizing, lightly salt and pepper the chicken on the side that you will place your bean/cheese mixture on.
Putting it all together.
1. Preheat oven to 350 degrees.
2. Spray a cooking pan with non-stick cooking spray. Then place about 1 TBSP of your beans/cheese mixture in the center of your chicken breasts. (roughly distribute the mixture evenly among your breasts).
3. Take the end of your chicken and roll over the mixture until you have completely “rolled” the chicken. Place the chicken breasts side-by-side in the pan placing the “fold” of your chicken on the pan surface or the "bottom". This will help keep the chicken in place and rolled as it cooks.
4. Taking 4-8 TBSP’s of pizza sauce generally cover the top surface of all the chicken breasts, evenly distributing the sauce amongst the four. Top the breast with your seasoned tortilla chips.
5. Cover chicken with foil and bake in the oven for 20 minutes. Then remove foil and continue to cook uncovered for a remaining 15 minutes. This allows the topping to get nice and crunchy. Remove from oven, best served warm. Enjoy!
These chicken breasts are surprisingly filling and I didn’t feel the need to pair it with any other dishes, however, a simple serving of any vegetable would also work. 

Fresh out of the oven. They look liked a clumped mess
but rest assured they separate easily.
*** Inspired by Food Network's Lisa Lillien, host of Hungry Girl, and her recipe for Nacho Stuffed Chicken***

Monday, August 29, 2011

Flour-less Chocolate Cake


This flour-less chocolate cake is perfect for gluten free dieters and the chocolate lovers alike. It is very rich and a little goes a LONG way. You can also add in raisins and nuts to make a nice little “addition” to the flavor palate.

Flour-less Chocolate Cake w/Raisins
served w/ Vanilla Ice Cream

Flour-less Chocolate Cake
1/2 cup of finely chopped semi sweet chocolate
1 stick of butter
3/4 cup of sugar
3 eggs
1/2 cup unsweetened cocoa powder
Optional ** 1/4 cup raisins or walnuts

1. Preheat oven to 375 degrees and butter an 8-inch round baking pan. Line the bottom of the pan with wax paper and butter the pan. (will make removal and clean up REALLY easy)

2.  In a double boiler or using a metal bowl set over a saucepan of barely simmering water melt the chocolate with the stick of butter, stirring until smooth. Remove metal bowl from heat and whisk in the sugar. Then add in one egg at a time until completely blended. Sift in 1/2 cup of cocoa powder and mix well.

3.Pour batter into your buttered pan and place in the oven for 20-25 minutes or until the top has formed a thin crust.  Remove from pan and cool on a baking rack or on room temperature plate for approximately 5-10 minutes. You can lightly dust the top of the cake with additional cocoa powder or with powdered sugar.

4.  Best served with ice cream. Vanilla or light flavored sorbets (orange, lime, lemon, etc). Enjoy!

Green Tea Salmon Marinade w/Boiled Carrots


This one is quick, easy, healthy, filling and it only takes an hour to marinade and 20 minutes to cook.
Green Tea Salmon Marinade w/ Boiled Carrots


Green Tea Salmon Marinade with boiled carrots
1-2 Salmon Fillets fresh or thawed
3 green tea bags
bottle of lime extract (you'll only use a few TBSP)
lemon
½ cup pancake syrup
3 sticks of carrots

1. Bring water to a boil making sure you have at least 1 cup’s worth for your marinade. Take three tea bags and place in a mug with 1 cup of boiling water and cover for about 5 minutes. Move hot/warm (not cooled) tea to freezer safe bag and add 1 TSP of lime extract and about a 1/4 zest of a lemon. Place salmon in the bag and let marinade in the fridge for about an hour but no longer than an hour and a half, as you don’t want the proteins in the salmon to break down and turn into mush.

2. Rinse your 3 carrot sticks with water and peel length-wise leaving you with long carrot strips. Bring a pot of water to a boil and salt the water. Add carrot strips and boil for 5-8 minutes but DO NOT over cook the carrots or they will turn to mush. Drain and set aside.
Carrots peeled

3. Remove marinated salmon from the fridge. Heat a non-stick skillet over medium heat. Spray with cooking spray and cook your salmon until the fillet “flakes” easily and is cooked thoroughly.  Discard salmon marinade. Do NOT use when cooking the salmon. In a separate small saucepan bring to medium heat and add 1/2 cup of pancake syrup, 1 tbsp lime juice, and the juice of one half of a lemon. Stir ingredients until the sauce thickens, remove from heat and generously cover cooked salmon with syrup.

4. Plate cooked carrots and set glazed salmon on top. Enjoy.